Objective: To design and print an electroluminescent display.
Pre-lab
|
|

Lab
|
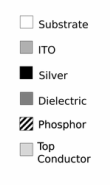
Components used in the Electroluminescence Lab
|
|
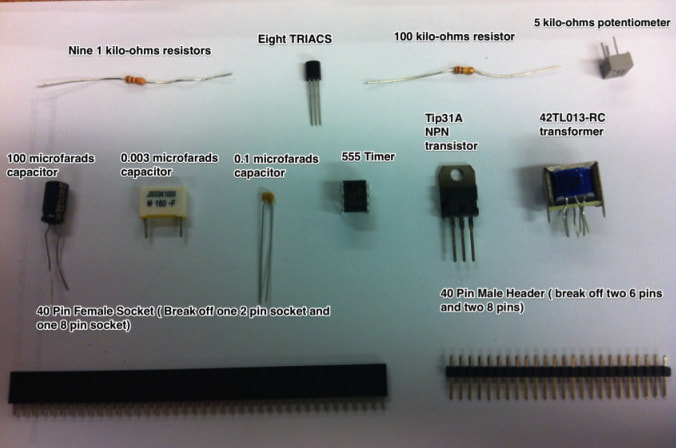
Assembled EL Drive Shield
|
Assembly
Assembling the EL Drive Shield:
Note: Make sure to orient the TRIACS' straight edge along the outline of the board. Place the components' pin 2 ( Gate) in between the two soldering holes.
Note: Observe the jumper wire. You will need this to connect to the digital and high voltage grounds.
|

|
Connecting the EL strip:
The commercial EL strip has three segments with a common electrode:
- The common electrode ( the blue wire) should be connected to the HV (High Voltage) from power supply
- The segment electrodes ( the yellow, green and red wires) should be connected to EL1, EL2 and EL3
- To Test the operation of the circuit, load EL.pde onto your Arduino and run the sketch
Note: You should see the different segments of the EL strip flash in alternating sequence.
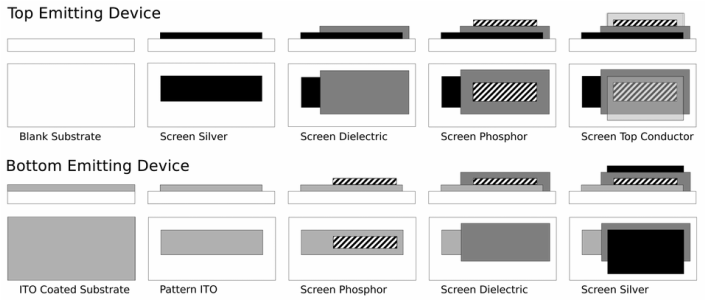
Further Information About Electroluminescent Technology
How To Print Silk-Screening EL Display Using Electroluminescence Ink:
Useful Links:
Electroluminescence Files:
|
|
|
| ||||||||
